![]()
Setting Up ROBOLAB
|
Installation You will NOT be using the software that comes with the Mindstorms kit. You will be using ROBOLAB, which is a separate program. It takes about 30 minutes to install ROBOLAB. It is recommended that you install it at the beginning of class before you start your parts inventory. You will need to have administrative privileges to do everything on this page, especially if you are using a school computer. If the MindStorms kit you are using has an IR Tower which uses the USB port of your computer, you will need to configure that at the same time. For the USB Port: After you have installed ROBOLAB, plug in the IR Tower. Have the ROBOLAB CD handy as Windows will probably prompt you for the ROBOLAB CD. Follow the prompts to install the driver. |
You Are Here:
|
Configuring ROBOLAB
ROBOLAB allows you to write rather complex programs using simple block diagrams. While ROBOLAB is installing, read pages 4-7 in your Constructopedia (the thick book in your MindStorms kit) to familiarize yourself with the LEGO RCX controller.
Once you have read those pages in the Constructopedia, start ROBOLAB, and click the Run ROBOLAB (TM) button.
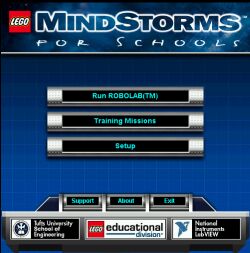
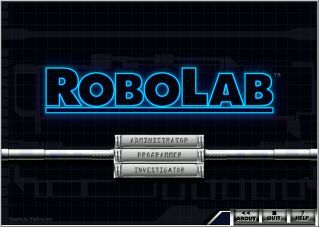
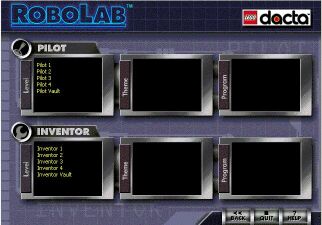
On the first ROBOLAB screen, select Administrator.
Click the icon for SELECT COM PORT
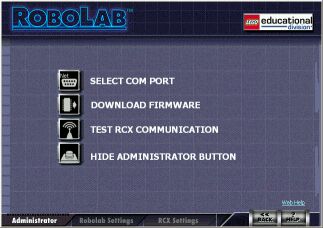
Click the Up and Down arrows until the selection is USB. Then click the check mark. NOTE: If you do not have a USB device listed here, you need to plug the USB Tower into your computer until your computer "detects new hardware." It will then prompt you for the ROBOLAB CD so it can install the driver. If you are using a school computer, you will need an administrator to do this for you.

Now click the Robolab Settings tab on the bottom of the screen. It should look something like this:

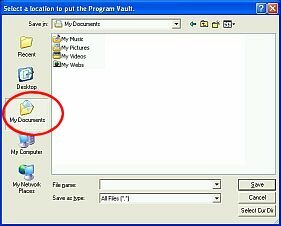
We are going to change the working path of the Program Vault. Click on the text of the file path and a new window will pop up. Click the My Documents button on the left side and you will be placed into the My Documents folder.
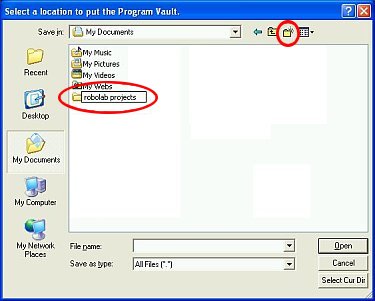
Create a new folder in this directory called "robolab projects." Then, double-click on the new folder to go into it.
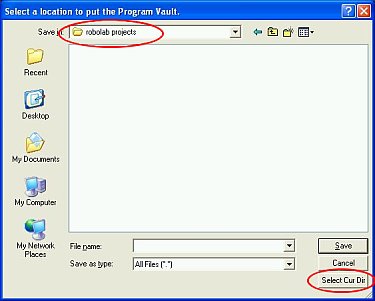
Once you are inside that folder, click Select Current Dir in the lower-right of the window. After waiting a few seconds, the path for the Program Vault path will update.
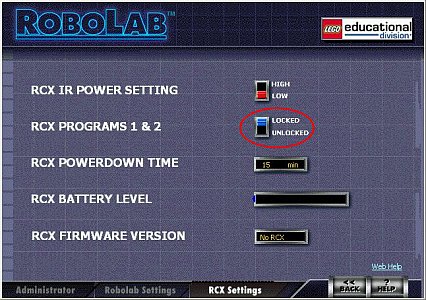
With your RCX turned on and aimed at the IR Tower, Click the RCX Settings tab. Robolab will attempt to communicate with the RCX for these settings. If you have trouble communicating using the IR Tower, try reading the Troubleshooting tips. When the RCX has successfully linked, make sure the RCX PROGRAMS 1 & 2 is UNLOCKED.
Now click the <<Back button to return to the main window. Then select Programmer.
On the next screen, double-click on the Inventor 4 in the Inventor selection window.
A new ROBOLAB diagram will open which looks like this (the background color may differ):
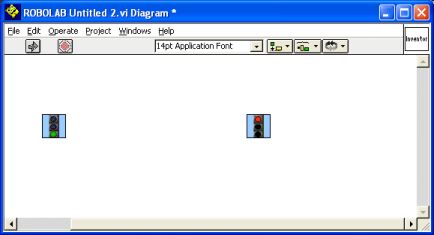
If you ever need to update the port for the IR Tower, you can do it from the Project pulldown menu in this Diagram Window.
![]()